Tuesday 29 September 2015

Frozen treasures

If you're looking for something easy to set up (but you do need to plan at least 24 hours in advance) that will occupy your toddler for an hour plus then keep reading...


Digging items out of ice - is there anything more exciting to a toddler than liberating "treasures"?! I usually pick either small cheap objects that are "new treasures" (first activity below) or recycle old things he hasn't seen (or been allowed to play with!) before (second activity). You can get as simple or as fancy as you like - lob  everything in a big Tupperware with water and freeze it in one solid block, or freeze in individual mini portions. The choice is yours :) you could even used coloured water to make the ice.

Frozen treasure block

This was the first big block we tried. D was 2 and a half. When the ice was rock solid he wasn't sure about it but as soon as it started melting a bit and he liberated his first "treasure" he was hooked!


I froze the ice block in layers so that the objects were evenly scattered throughout. Retrospectively I think he might've enjoyed it more if the block had been less high, making it easier for him to get to the buried objects. If you have a group of kids doing it then a bigger block will be better - one of D's friends was here but wasn't really interested in playing with it so it ended up being a lot of ice for one little person! His excitement levels definitely rose as the ice melted and this was the first time we talked about water melting ice and using salt to help melt ice faster.

Frozen lego


We did this one recently (D is 34 months) and it's very interesting what a difference a few months make! This time I froze a few lego men and some 5p pieces in their own domed ice cube (using one of Iz's weaning pots).  I only half filled each well first and then put in the items and let it freeze before filling up the rest of the hole. This meant the objects were not all at the bottom (they float) when I flipped the cubes over, but halfway up. Once they were frozen I put them into a large baking tray, added a little bit of water and froze once more.

The set-up:
- frozen tray
- small dish with salt
- spoon, fork, knife (I used baby ones so they weren't too sharp and/or big)
- squeezy bottle with warm water (coloured pink)
- squeezy bottle with cold water (coloured blue)

As soon as D saw the lego men he was hooked. Interestingly he only targeted one ice mound at a time and carefully worked on it until that man or 5p was free. Then onto the next one. I reminded him how the salt would help melt the ice and so he put little piles on the top and then watched as the ice started to crack. I love hearing how his language and understanding is progressing, saying things like "listen mummy, it's cracking like an egg" and "look at that new hole".

It was also a great way to introduce hot and cold. I used pink and blue food colouring to emphasise which bottle was which but D could already easily identify just by feeling. When he'd used all the original water I re-filled the bottles from the icey water in the tray and he quickly realised how much colder the ice made the water.


And for me? I felt like we were freeing Han Solo trapped in the ice - a young Harrison Ford needing my help? I'm down with that ;)


Sunday 27 September 2015

Pom pom pictures

We did a super simple activity this weekend but both kids enjoyed it (and it brightened up our rather boring windows!).


All you need is:
- sticky back plastic
- a black felt tip (I used a sharpie)
- some pom poms

First I cut the sticky back plastic to just smaller than the window pane. Next I drew a butterfly and snake on the paper side. Once happy with size etc I then traced it through on the see through side.


Then I stuck each piece to a window pane with sellotape, put some pom poms in a bowl and invited the kids to unwrap the "magic paper".


D was much more methodical than I imagined he'd be and carefully placed a pom pom in each diamond on the snake's back. Iz was a bit more haphazard (but no less careful!). They both loved sticking their hands to the pictures and feeling the stickiness.


They had fun taking the pom poms on and off and rearranged the butterfly several times. Each time a pom pom came off it left a little bit of coloured fur on the sticky paper, which made it even more colourful. I love how much they brightened up our boring back wall!

Thirsty work, sticking on pom poms...


After the kids had finished playing with them (had to wait til the next day as they kept going back to them during the afternoon to do more rearranging!) I took off the remaining pom poms and put a piece of white paper on the back and cut out the animals. Now we have 2 beautiful colourful pictures :)

******

I've seen various ideas on this theme including tissue paper and a really cute one using leaves and grasses foraged on a nature walk (can't remember the blog but will link it up if I find it). I'd love to do one with different coloured petals - maybe next year when our garden's been in full bloom :)


Sunday 20 September 2015

Blacklight fun for toddlers


I recently posted about blacklight stuff you can do with babies that insist on eating everything (Iz...) but let's be honest, there are way more fun things you can do once they've moved past this stage and you don't have to worry about stuff being edible. Here are some recent things we've done with D:


Waterbeads

These turned out even cooler than I thought. I just put some dehydrated waterbeads in some thiamine water and left them for 24 hours. Because they absorb all the water as they grow these looked awesome under the blacklight!


D scooped them, filled cupcake cases, squished them. Don't they look cool?!


And then he mixed them with shaving foam for a completely different sensation - they even made the foam glow!


Then after playing we just stored them in a Tupperware on a little bit of water and they were ready for instant play over and over again :)

Note: even without the blacklight the beads will appear the colour they are when dehydrated (or a yellow colour if clear beforehand) so you can equally play with them in regular light too


Playdough

We used this amazing recipe from Fun At Home With Kids to make our own playdough - less than 5 minutes and in a microwave. Amazing! I had to fiddle the ingredients a bit as they were all in American measures but this is what I did and it worked great:
150g flour
100g salt
2 teaspoons cream of tartar
240ml water
1 tablespoon oil

(we obviously used thiamine water as we wanted it to glow under the blacklight, but equally if you just want coloured playdough just put a few drops of food colouring in the water before adding it).


For the full directions click here (definitely recommend it - so super easy and they are likely all ingredients you already have in the cupboard at home).

Then we just used it like regular playdough - but with glows! Awesome :)

How cool is that glow?!


Foamy soap bubbles

We did this a while ago but I just haven't managed to write about it until now. Firstly I made some glowing bubble mix (just mix bubble mix with neon paints) in a range of colours. Then blow like crazy with a straw. Cue massive mountains of brightly coloured bubbles that just explode over the top of the cups! 


The plan was to make bubble print pictures but to be honest he just got a bit over excited by the appearance of the bubbles and so just wanted to play in them! He did eventually lay down some watercolour paper and made bubble prints - not quite what I'd initially envisaged (a little more smeary!) but lovely nonetheless (and even more so as they were completely D's).


Then the colourful foam was just too tempting so it became a glowing bubble-free-for-all and soon became a foamy smooshy bubbly mess :)


Quick aside - I think I've mentioned this before but if you want to do activities that involve straw blowing and not sucking (sometimes difficult for toddlers to master and a mouthful of bubblemix is not that tasty...) then make a little hole in the shaft of the straw. Just doing that makes it pretty much impossible to suck anything up the straw, even if they try! 


Bubble art

And finally blacklight bubble art which I've blogged about before (see here).


******

Still not tempted to buy a blacklight? We've got even more activities planned so, if not already, hopefully you will be soon! 


Friday 18 September 2015

Painting with guns

Fancy a completely new way to paint? Grab some cheapie water guns and I guarantee fun for all your kids!


I first saw the idea here but they used easels and blank sheets of paper and were quite a lot older than D. So I changed it up a bit to make it more appealing for him and came up with something a bit more "toddler friendly" :)


What you need:
 
-  Plastic water guns - I got a pack of 4 from Poundland. Work perfectly and hold a decent amount of paint without there being a lot of wastage.
-  Paints (am sure most kinds will work - we used the regular kids paint from Poundland)
-  Paper
-  Some sort of groundsheet if you're doing it inside or on grass

Mix the paint with a bit of water (I did about 2:1) so the paint is more easily "squirtable" and then carefully pour into a gun. Repeat for as many colours as you want (or for however many guns you have!). I made 4 colour guns.


As you can see in the pic I drew a standard target on one side and some shapes on the other. I thought this would engage D much better than just a blank sheet of paper, and it did. He loved trying to aim for particular places and choosing which colour to squirt in which shape. 


Although supposed to be something fun it also led to colour and shape recognition practice - fun learning is always a bonus!

 
D sat and squirted for ages, only stopping when all the shapes/target had been fully coloured in. There was quite a lot of "run-off" because the board was at an angle so I actually wedged some kitchen roll along the bottom so the paint got absorbed straight away (you can see it underneath the wooden frame in the picture above).
 
For us this was all about the process and so we used a massive piece of paper. If you wanted to keep the artwork afterwards you could always cut out smaller pieces once dry or just use smaller paper pieces to start with.


******

We had so much fun with this activity and will definitely keep revisiting it, especially as it is something even much older kids (or adults!) will enjoy so no chance of my kids growing out of it!!


Friday 11 September 2015

What Iz loved - August 2015

Here is what Iz loved this month:


1. Becoming 1!!
2. Her new doll
3. Birthday cake!
4. Fun under the blacklight
5. Messy fun
6. Learning to roly poly...
7. Her other new doll :)

******


Tuesday 8 September 2015

Can you potty train in 3 days?


So we did it... and lived to tell the tale! We went from having never even tried without nappies or sat on the potty to fully using the potty or loo for all wees/poops in 3 (well actually nearer 2) days – yes… three day potty training really *does* work :)

There seem to be an endless number of "best ways" to potty train but I say go with what you think sounds do-able for your family. I had 3 days off work midweek so could dedicate that time to D whilst Iz was in nursery and so the plan for us was always to go nappy cold turkey and crack it (I was hoping!!) in 3 days. But some people prefer a slower approach and that's fine too.

Anyway here is D's story... 

Background

So best laid plans and all that. I'd earmarked Monday-Wednesday as our 3 days as then I could focus on D whilst Iz was out of the house all day. But he had other plans and woke up on Saturday morning demanding "big boy pants". Obviously this was the weekend that Mr MFDS was away for both days and I was home alone with D and Iz (who was typically teething, cranky and just wanted to be cuddled all day long!!). But anyway I didn't want to discourage him so I just went with the challenge!

Method

I can't remember who's method this is, or if it has a name or what. I just remember some mums discussing it on a baby forum and thought ok that sounds like the way I'd like to do it. The basic rules were:
  1. cold turkey nappies off all day and night
  2. stick by your child's side ALL day long (if you're more than 2 metres away you're too far) and watch them non-stop (if you're checking your phone then you're not paying enough attention apparently...)
  3. don't put them on the potty on a schedule and don't ask if they need to go, just keep reminding them "don't forget when you need to wee/poop tell mummy so we can run to the potty" and remind them of this non-stop
  4. praise them a lot
I stuck to some of the rules but adjusted a few too. We did go nappy cold turkey but I still put one on D at night and for his afternoon nap. I clearly couldn't be attached to him 24/7 as I also had a cranky baby to placate but I tried to prioritise him as much as possible and was as vigilant as possible. But I was very strict about doing the "remember to tell me" speech and repeated it ad nauseum. Literally every 10 minutes on the first day! I think it gives them some sort of control rather than you constantly pestering them "do you need to go now? Are you sure you don't? Is a wee coming?" etc etc. And I praised him a lot - even when there was a massive wee puddle on the floor and he only managed a tiny dribble in the potty... he still got big claps and a sticker.

So what actually happened?

Day 1

By lunchtime he'd had 7 wees. On the floor, in the highchair, in the garden - basically anywhere except the potty. He often didn't even seem to realise what was happening until it was too late. Most times he did manage to still pass a tiny bit in the potty so I gave him lots of praise even though inside I was crying! Then just before lunch he pooped in the potty - amazing!! My hope and faith was restored. The afternoon was better with only 2 wees on the floor - this was mainly because he's realised he got chocolate if he pooped in the potty and so kept trying to poop, which resulted in bonus potty-based wees!

Day 2

A new day and a new start! By lunchtime we'd had 6 wees but 2 were completely in potty, 3 had a tiny bit in pants but most in potty and only one was more 50/50. Even better in the afternoon with 1 fully in potty and 2 mostly in potty. Anyone else surprised at how many wees toddlers do a day?! I definitely was!!

Day 3

Even more amazing – D’s nappy in the morning was nearly dry. Normally his nappies are so full in the morning they leak everywhere so this really was amazing :) This day he only did 2 wees the whole morning (both in potty) which kept me pretty nervous as I kept waiting for the next one to come! He also did a big potty wee pre-nap and one immediately post-nap – so pleased with how quickly he learnt to hold his wee for longer periods and recognise the feeling of when he needed to go. We did nearly have a poop incident but luckily I recognised his pooping face and whisked him to the potty just in time! Lol.

Day 4


Again his overnight nappy was only a little damp on waking and he asked for a wee as soon as he woke up. No accidents all day :)

Day 5

On this day I tried not to talk about the potty a lot and didn’t remind him as much to tell me when he needed to go. I was so proud when he ran to the potty for a wee and poop completely unprompted :)

Nursery…

From day 6 D was back at nursery and to be honest I was a bit sceptical about how it was going to go. I was obviously hopeful that he was going to carry on the same but was also well aware that there are way more distractions at nursery, more exciting things happening etc etc. On the first day back he had diarrhoea (poor D!) so that was probably a bad day to judge anything on. But after that he did amazing – no real accidents, just sometimes a tiny damp patch in his pants before he managed to hold it til the potty and pretty soon even those had stopped.

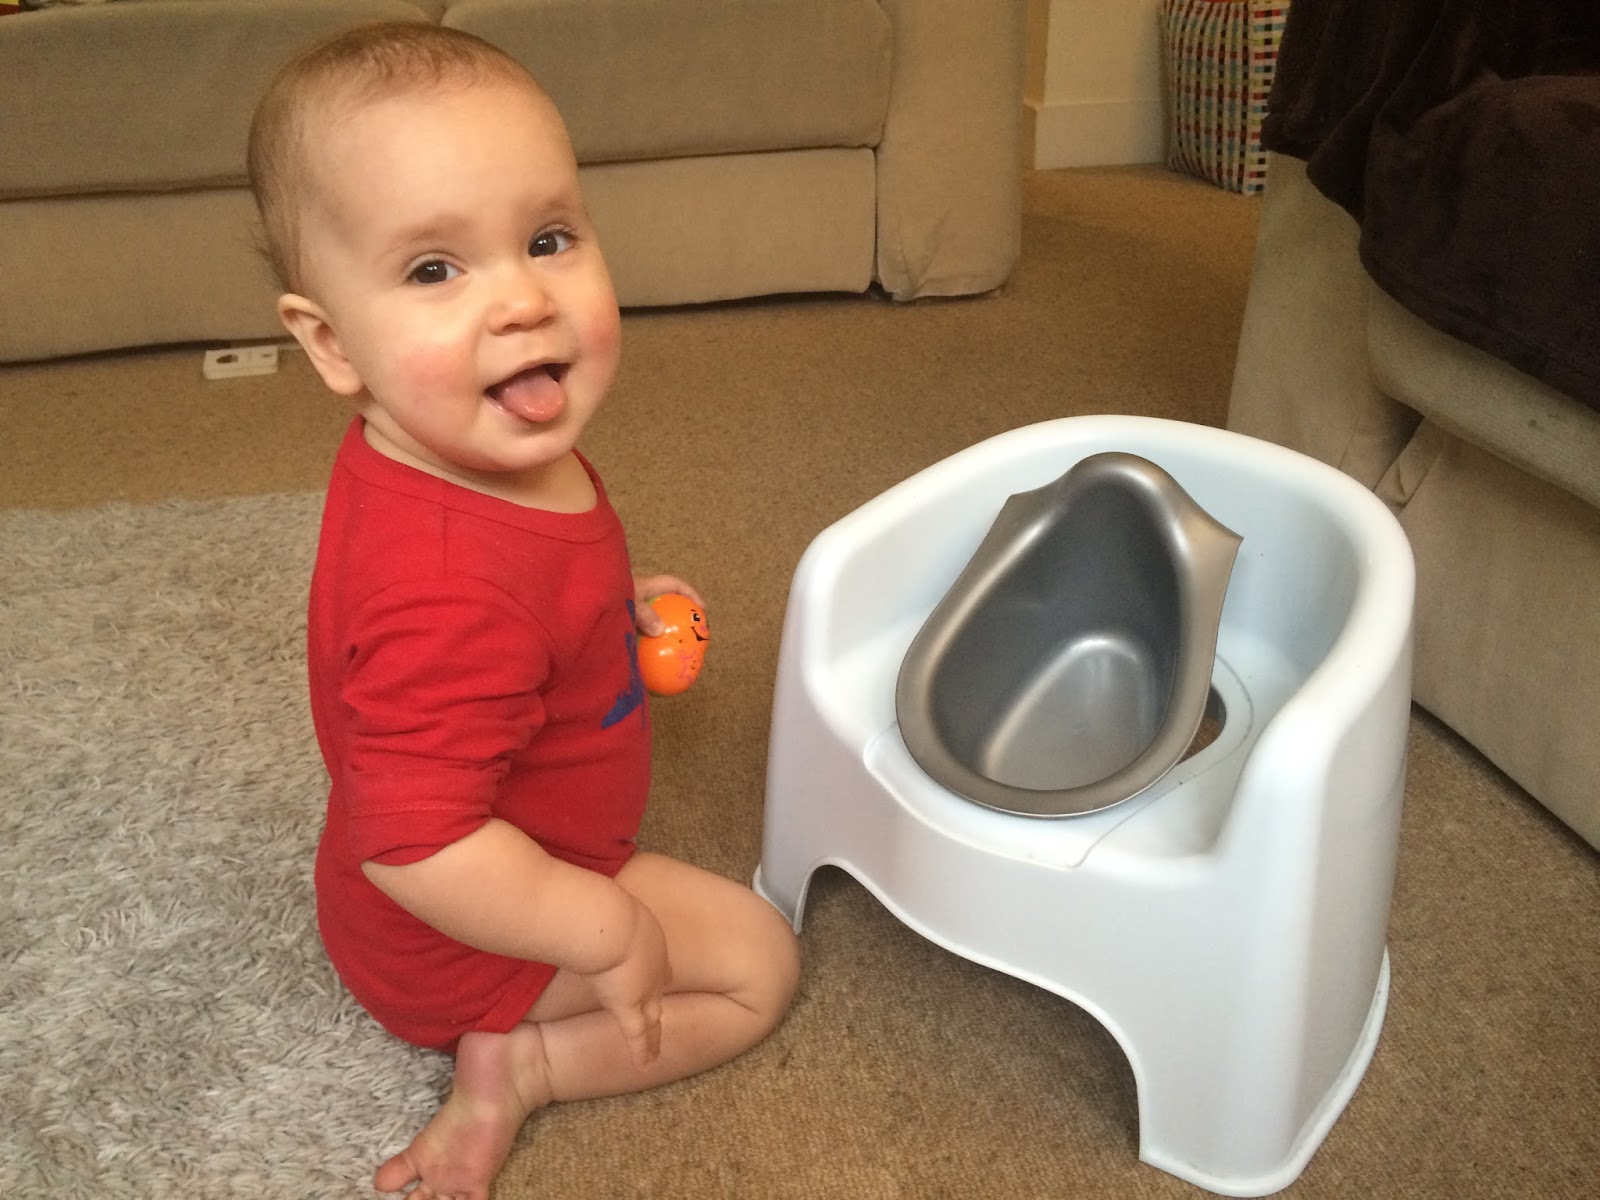
Pretty painfree huh?

So proud!


What rewards do we use?

This is one area that I'd say think quite carefully about - you'll see why in a minute! We used a combination of stickers, chocolate and small presents (mostly from Poundland). Every time D did a wee (or part of one) in the potty he got a sticker. Each day we made a new “background” and had different themed stickers (eg pirates, dinosaurs, aliens) and D gradually built-up a picture throughout the day. If he pooped on the potty (the whole thing in the potty) then he got a small Frozen chocolate bar (also from Poundland) – he loves Frozen! And then at the end of the day, or sometimes at random other times if I felt he needed a bit of encouragement, he got small presents, which doubled up as activities we could do together whilst tied to the house – eg new painting brushes, a stamping set, animal shapes to colour in, bottle of bubbles.


His sticker reward pictures from days 1-4 :)

A warning – D did go through a 24 hour phase of trying to poop all the time just so he earned more chocolate… After that we quickly established ground rules that only proper sized poops got chocolate, small ones did not!
The first Frozen chocolate bar he won!
Some top tips:
  • don't start when you're also looking after a baby, especially if they're teething and cranky
  • make sure you have enough milk and bread in the house as once you start you can’t really leave for at least 48 hours… (thank you to my brother who did an emergency shop for me!)
  • think carefully before you bribe with chocolate!
  • visit Poundland for cheap treats
  • don't keep asking if they need to go, just remind them to let you know when they want to
  • have a stinky song you can sing (either while waiting for one, or afterwards – you can choose!) - something to distract them and/or encourage them
  • don't bother with trousers for the 3 days. You're only at home so just stick with pants as it is one less layer to remove
  • stock up on pants from somewhere like Primark or Asda. Firstly you need at least 12 pairs and if they're cheap and a particularly nasty accident occurs then you can bin them with a clear conscience!
  • buy a potty with a removal insert. Waaaaay easier to clean one like that. Trust me.
  • choose pants that your child will like. Now is not the time for subtle colour coordinating with outfits. This is the time for brightly coloured Peppa pants or dinosaur pants. Or in our case minion ones - if your toddler wants to wear the pants then that's 90% of the job done!


Hmmm maybe Iz is not that helpful to have around... ;)


Final thoughts:
  1. Have a few stock phrases for when they think they need the potty but nothing happens… you definitely don’t want to discourage them so I said things like "maybe stinky's not ready yet" and "maybe he'll come in a few minutes" as I didn’t want to deter him from going back to the potty a few minutes later if he needed to
  2. At the moment D nearly always needs a wee now once he's in bed and supposed to be going to sleep. Although some will say it’s a stalling tactic, we're just rolling with it for now as it is true, he does, and we want to encourage him to tell us and definitely don’t want him to think it’s ok to lounge around in a damp nappy anymore
  3. There are a few times I am more "directive" in my asking about potty use. One is if we're going out somewhere (in which case it is compulsory trying-to-do-a-wee first) or if he's dancing around the room clutching himself - then I figure he needs a gentle reminder! Lol. 

Yep it's your turn next my little minion...

Have you potty trained yet? Did you try it in 3 days or do something else? Feel free to share any other top tips below :)

******

Disclaimer: this is probably not the right method if you are very mess-averse and the thought of wee on your floor gives you the heebeejeebees. Use your own judgement to decide what you can realistically cope with ;)